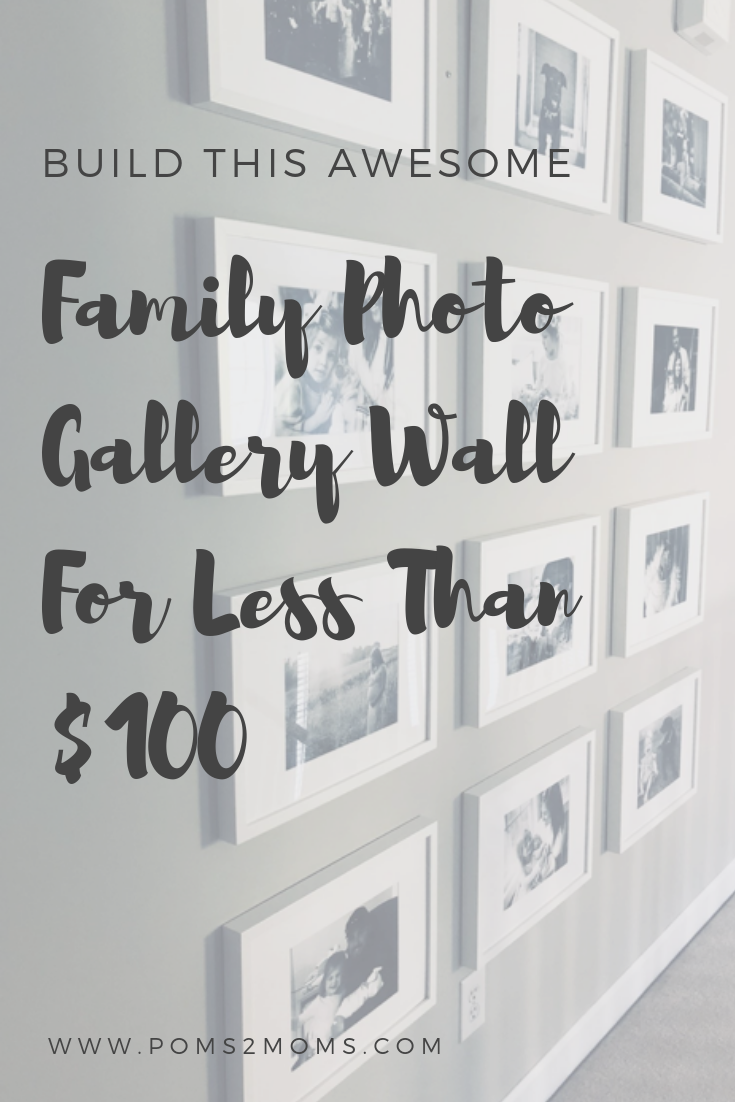
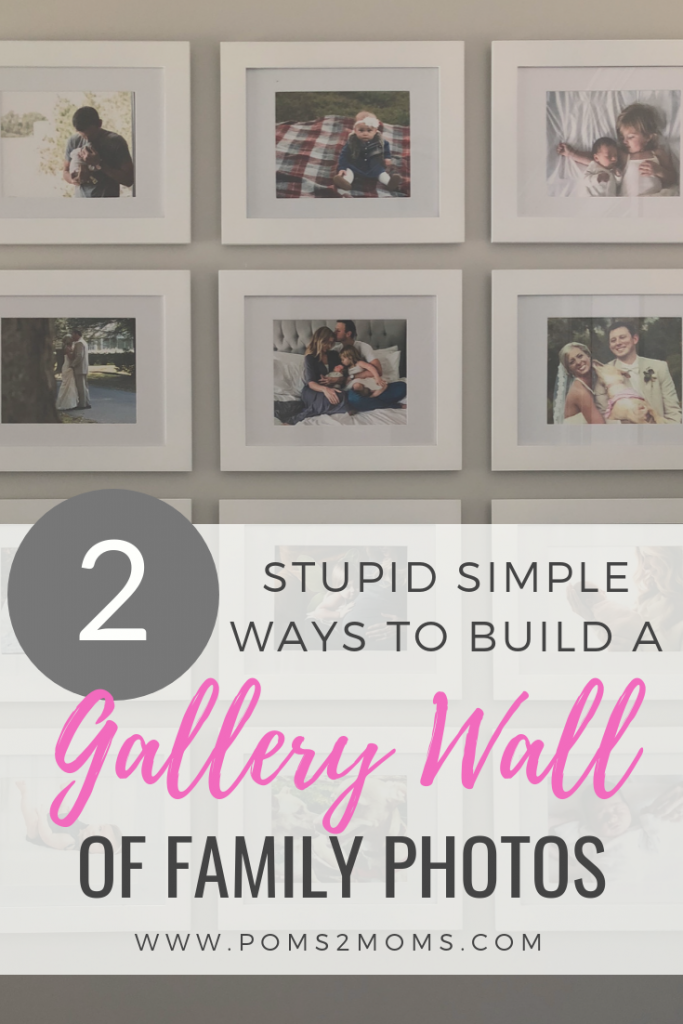
2 Easy Ways To Create Beautiful Photo Gallery Walls
It is that time of year! Yes… the holidays… but I am talking about the time when everyone is planning their coordinating outfits for family photos! This is something I adore doing and could easily add to our list of family traditions. It is so important to capture each stage of life!
[ReviewDisclaimer]
When we moved into our new home and were putting up our picture frames in every area imaginable, Drew made a comment that we use the same pictures over and over. He went off on a small tangent that we spend all this money on having professional pictures taken… but we just take the old ones out and put the new ones in.
[amazon_link asins=’B06Y2MN575,B06Y654KSH,B00MX2KKD0,B075S3P794,B07FCWQWTC,B014I9EE28,B01DJE3GTA,B073TYFM7M,B01M3P1CXR’ template=’ProductCarousel’ store=’poms2moms-20′ marketplace=’US’ link_id=’b1c3bf08-dc75-11e8-98a0-9b7673b3dc7c’]
He had a great point! We needed to find a better way to show off these pictures.. and not just in small frames in our bedroom. So while I only give Drew half the credit on the completed project, when we took our family of 4 to Ikea on a Saturday to hunt down picture frames, it was actually 100% his idea.
We had a wall in our house that had “gallery wall” written all over it. It was the perfect place to showcase all of the different seasons of our life that we had been able to capture with professional photography.
Fellow Poms2Moms “Mom” – Kaitlin – also has a gallery wall masterpiece in her house, but each of ours were made a little differently.
So today, I want to share 2 DIFFERENT, yet, EASY ways to showcase a collection of your favorite pictures in a photo gallery wall!
1.) Gather your supplies.
- 12 frames
- 12 pictures
- Measuring tape
- Level
[amazon_link asins=’B00KY08L52,B01LWALAT0,B073DD8B5D,B06XVZMWW8,B0083GP89G,B00MEGO784,B0756LX3RK’ template=’ProductCarousel’ store=’poms2moms-20′ marketplace=’US’ link_id=’51c3378d-dc76-11e8-a958-2998e8c9fd41′]
The above list will be required, regardless of the hanging method you choose. But below, you’ll need to decide whether you want to use 1.) a hammer and nails, or 2.) command strips.
- Option 1 – Hammer 24 1&1/2 inch finishing nails (this means it does not have a head on the end.) This will allow your frame to sit flush on the wall.
- Option 2 – 24 Command Hanging Strips
2.) Purchase your photo gallery wall frames!
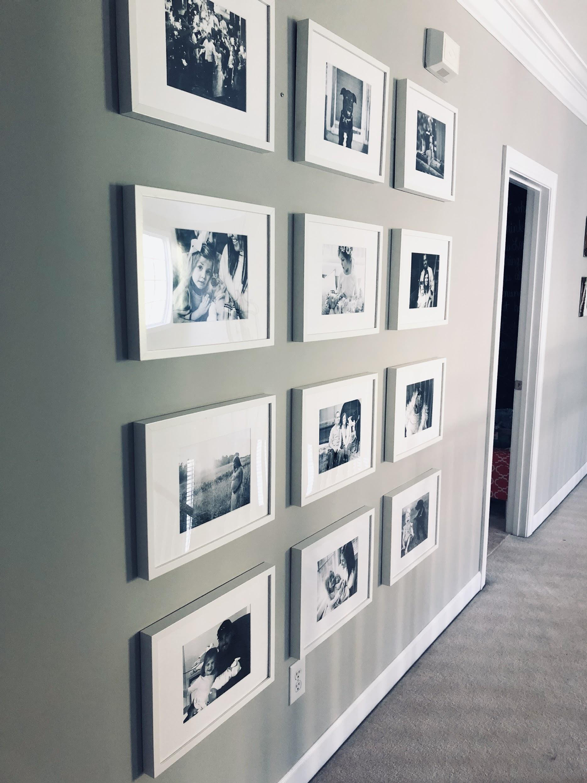
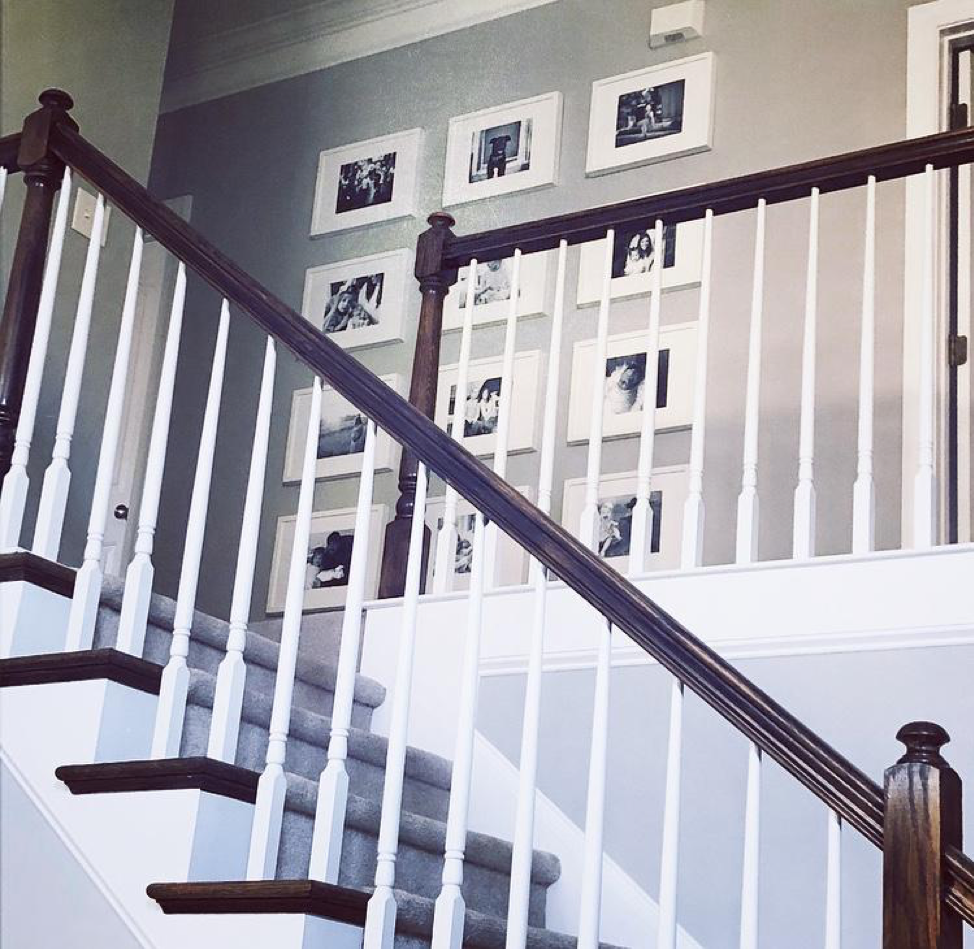
Option 1 – I bought mine from Ikea. They were only $7.99 each! They were 1 inch deep which is what I was looking for since I went with the nail option.
Option 2 – Kaitlin bought hers at AC Moore for $9.99 a piece – but Hobby Lobby, Michaels, or even Amazon also carry them. They are very similar frames except they are flush on the back and only ½ inch in width which make ideal for attaching with the command hooks.
3.) Select your pictures and style!
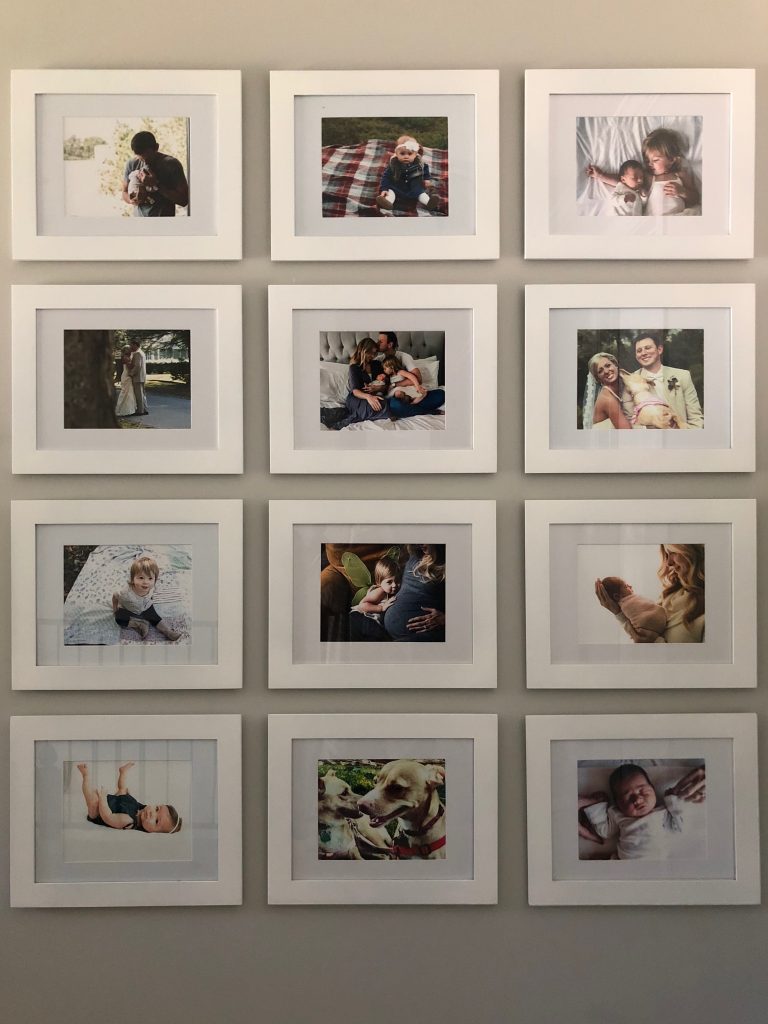
This should be the fun part! But it can be VERY challenging. I wanted to make sure I captured everything – engagement, wedding, maternity, newborn, pets, family – but somehow had to narrow it down to 12. So I picked my favorite from each professional shoot.
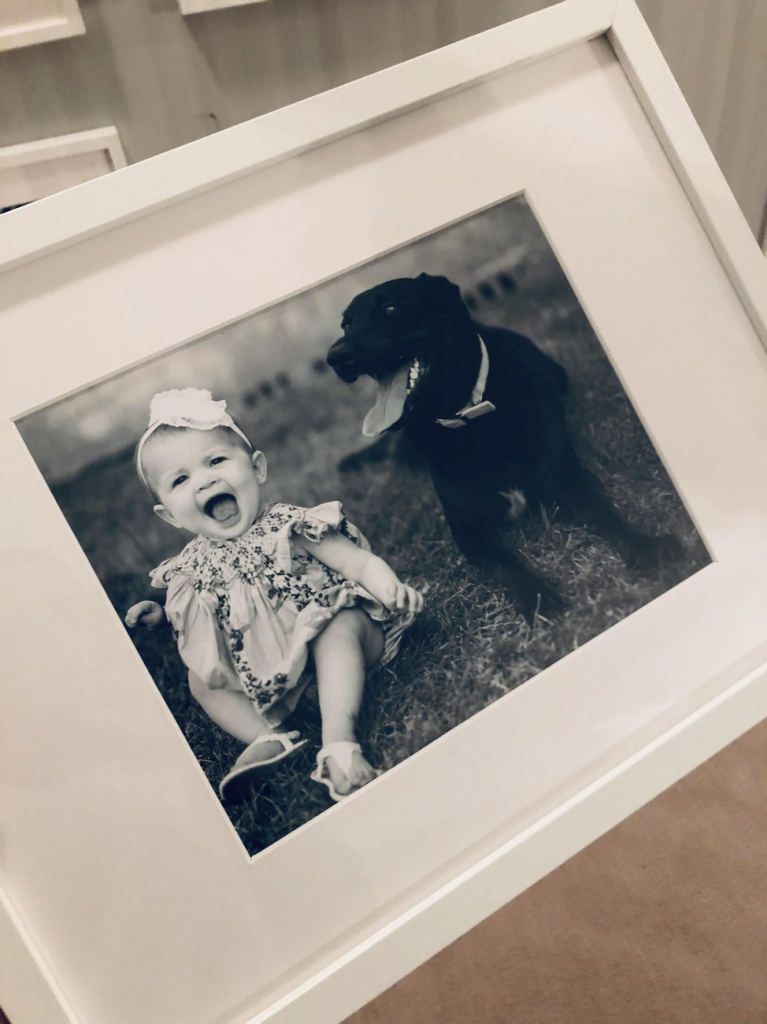
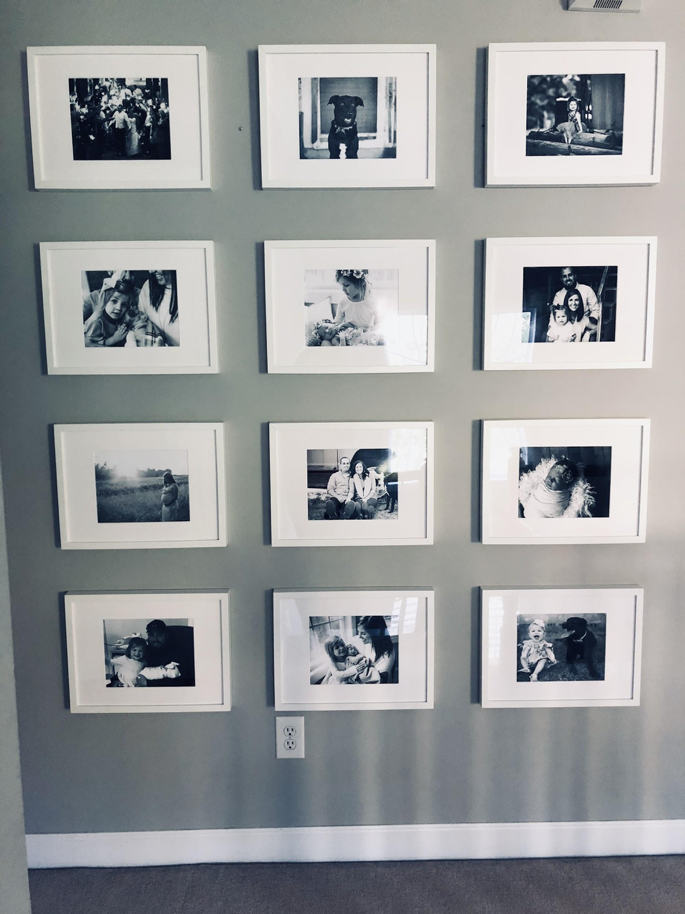
Option 1 – I opted for black and white. Our color schemes were drastically different with each professional shoot so I wanted to have one clean look.
Option 2 – Kaitlin went with color. Her photos all shared a similar style – (hey brittanyblakephotography.com!) – so she was able to arrange the pictures in an order that gave it all a cohesive look!
4.) Find your feature wall and get your measurements.
I measured the entire wall so that I could find the center and know how far to come down and into the wall. I am a visual person so I had to sketch everything out first.
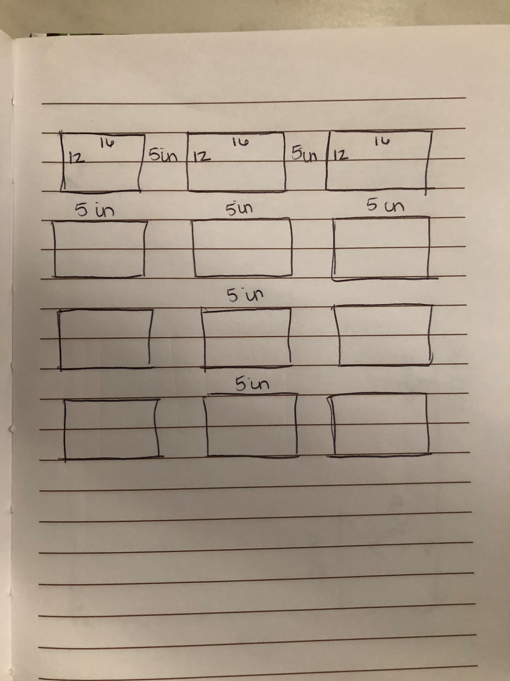
REMEMBER – when you are writing your dimensions and mapping everything out you have to take into account where your nails or command hooks are going to line up. They will not be at the edges of your frames. I measured ½ inch in for each frame.
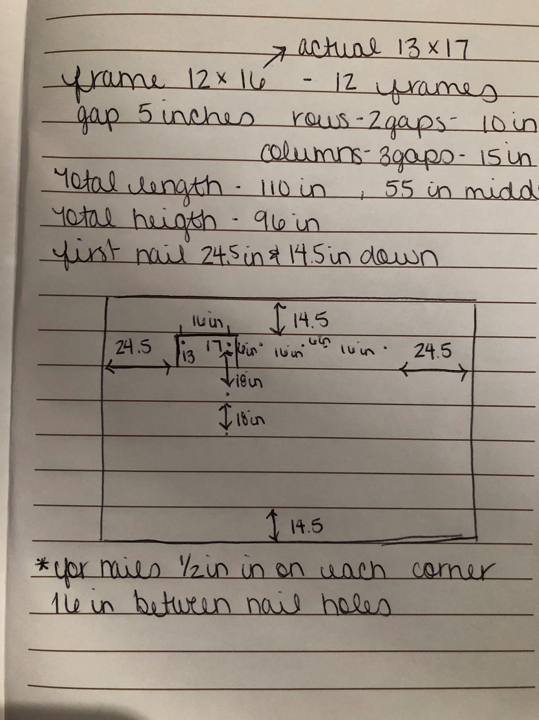
This “blueprint” put the nail snug in each corner and gives it a tight fit.
I am not going to get too much into the details here because everyone’s wall size, spacing, and frame size will be different. Make sure you measure your actual frame and compare it to what your frame has as the listed measurements. I just really encourage you to map it all out and double check everything before getting started.
5.) Get Busy!
Whether you are using nails or command hooks this is tedious work and making sure your measurements and lines are correct.
My hack is to do your entire first row. Start off with you first nail or hook and then move to your right with your correct dimensions. Once you have the first row, work your way down with your level and do the entire first column. Your measurement is the height of your frame plus your gap distance. Repeat this step for all 6 columns of nails or hooks.
6.) Arrange your photo gallery wall collection.
If you’re doing the command strip method, it is not as easy to move around the different pictures once they are attached to the wall, and you could risk messing up your clean lines. So I would recommend having this part figured out, first!
Otherwise, this is 100% personal preference! Have fun with it!
Option 1 – Finished Product!
Option 2 – Finished Product!
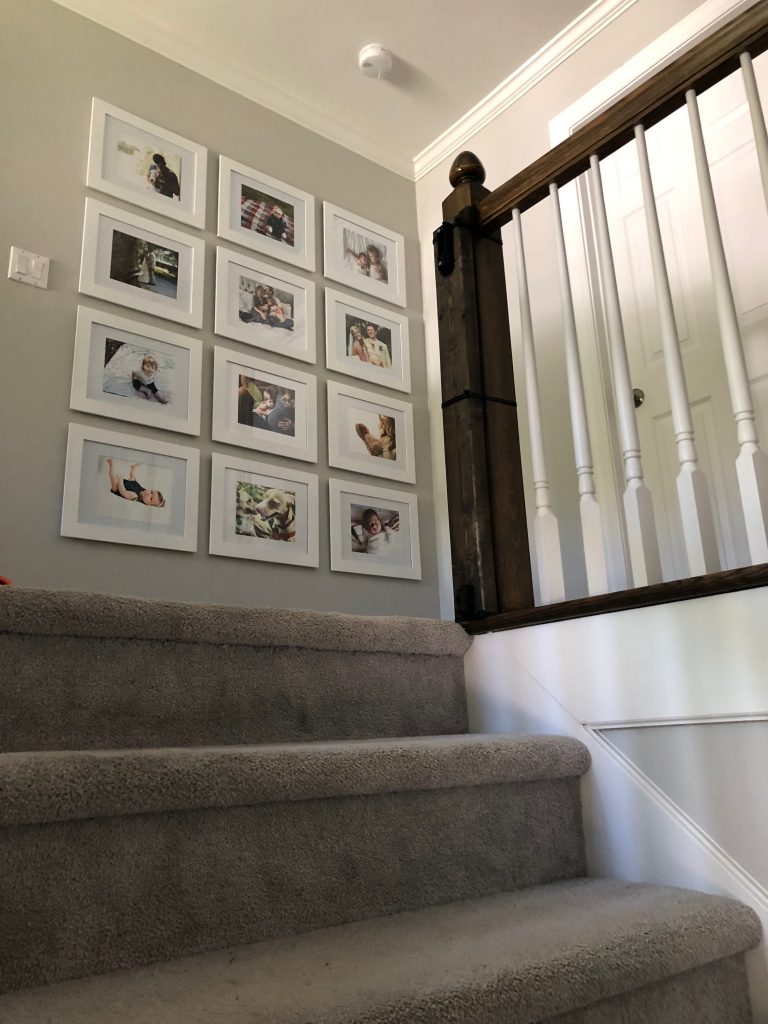
Step back and admire your beautiful work of art and get ready for the compliments! I do not have anyone come in my house who does not want to walk to the top of my stairs and look at this gallery wall.
How do you display important family photos in YOUR HOUSE?

About The Author
Jenny
Founder & author of the parenting & lifestyle blog, Poms2Moms, but my full-time job is wine. Find me writing about my two precious girls, aspirations to become friends with Joanna Gaines, and balancing home-life with my career. Cheers! – Jenny
D | 31st Oct 18
Lovely ideas and great tips with the measuring and layout before you start to hammer away! I love organisation and I would probably take too long with mapping my wall out. Hahahah. Sometimes overthinking these things are not soooo good, so it great to have your post with all these details.
D, xo || from https://livedreamcreate-d.com
Jenny | 20th Nov 18
Thank you! Most times with decorating I do not plan out like I should and end up moving things and patching holes, but this one I needed a clear plan.
ErinHaugerud | 1st Nov 18
This looks great! I’m obsessed with gallery walls!
Jenny | 20th Nov 18
Thank you! We are too!
Emily | 1st Nov 18
I love both of these gallery walls. Planning the layout on paper beforehand is a great idea. I’m sure it made things easier once you were ready to start hanging the photos.
Jenny | 20th Nov 18
It was a must do! I would have never put all of those holes in my wall without a clear plan!
Jenny | 20th Nov 18
It really did! As soon as I started nailing it was actually it was a really quick process.
Jasmine Hewitt | 1st Nov 18
simple white frames are my thing right now. this looks amazing the way you planned it all out
Jenny | 20th Nov 18
me too! I love a clean look.
Alexis | 1st Nov 18
I LOVE this! We have a ton of photos that need to be developed and I’ve been wanting to do a gallery wall. I’ve been eyeing those frames from Ikea. Sending this to my hubby so he can get busy 😉
Jenny | 20th Nov 18
Tell your hubby we said your welcome 🙂 The finished product will be amazing!
Shanophia | 2nd Nov 18
Absolutely love this i ant to do this on one of my walls. Saving this! Thank you!
Jenny | 20th Nov 18
You are so welcome! Please send us a picture of your gallery wall when you put it all together!